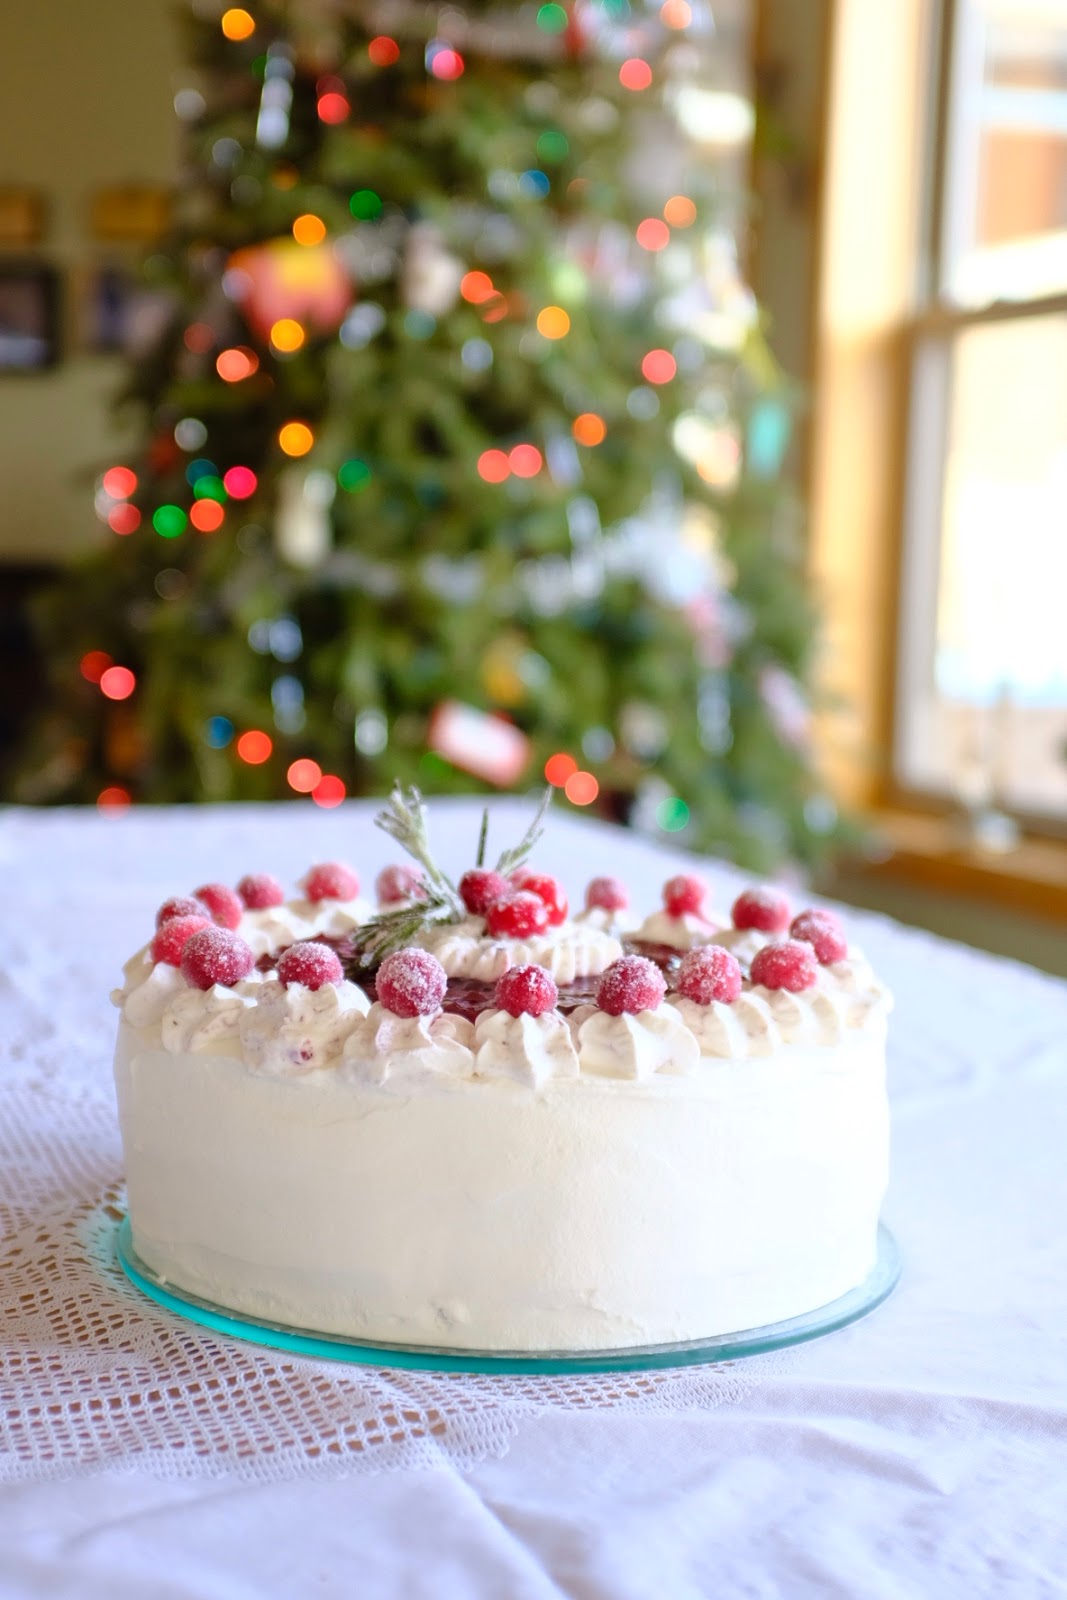
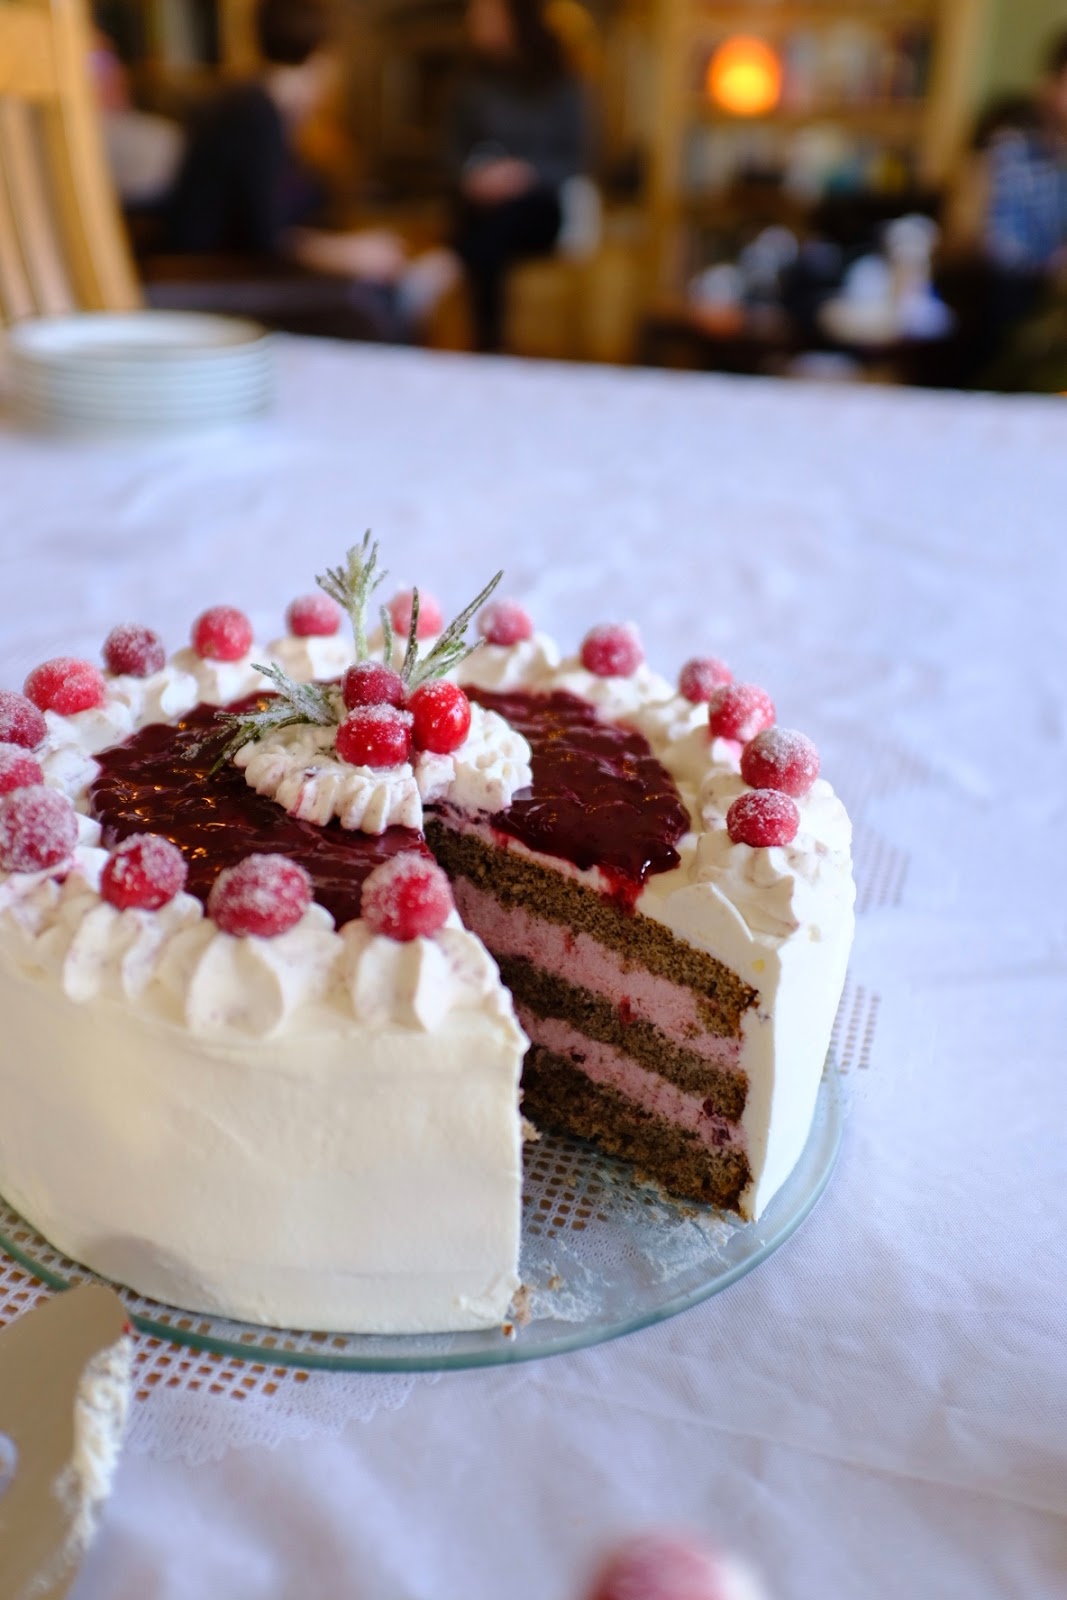
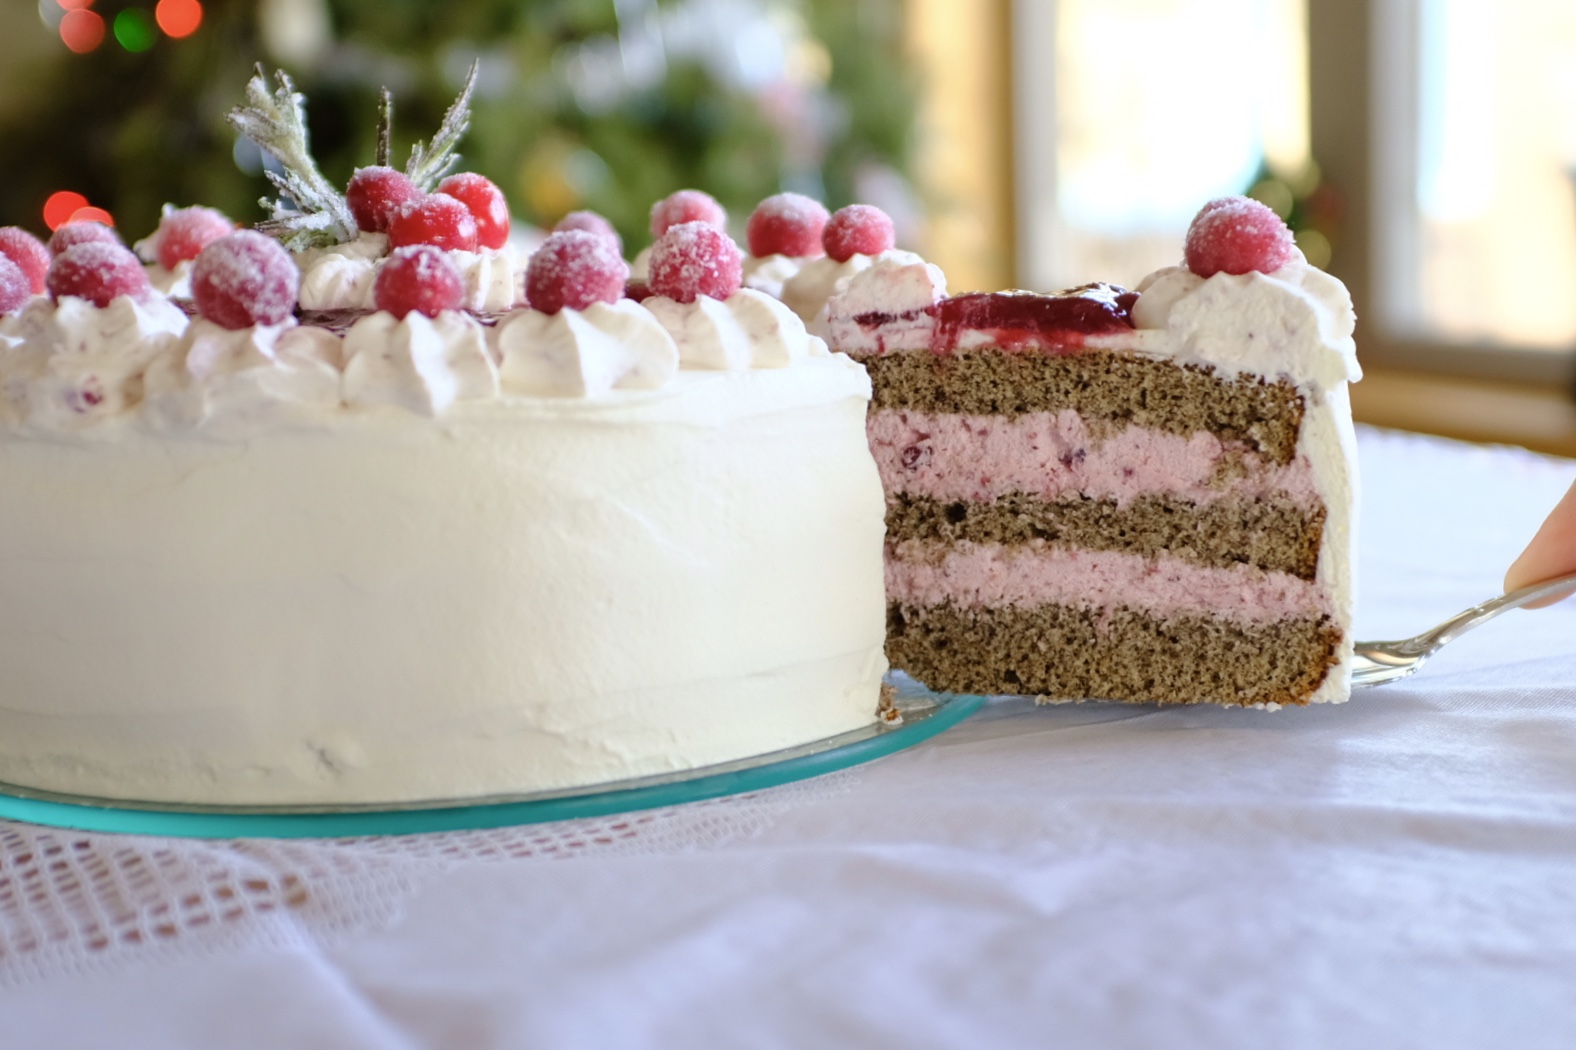
I've been in an absolute baking frenzy this week since I finished finals. I am finally in my senior year (after many many gap years) and am finishing strong with a couple of whopping 18-credit semesters. One down, one more to go! Almost thereeeee.
These cookies are a fun, easy project for sure. I love that they don't use a mixer and have some lovely, fresh flavors that shine amongst the usual gingerbread/sugar cookie whatsit found at Christmas.
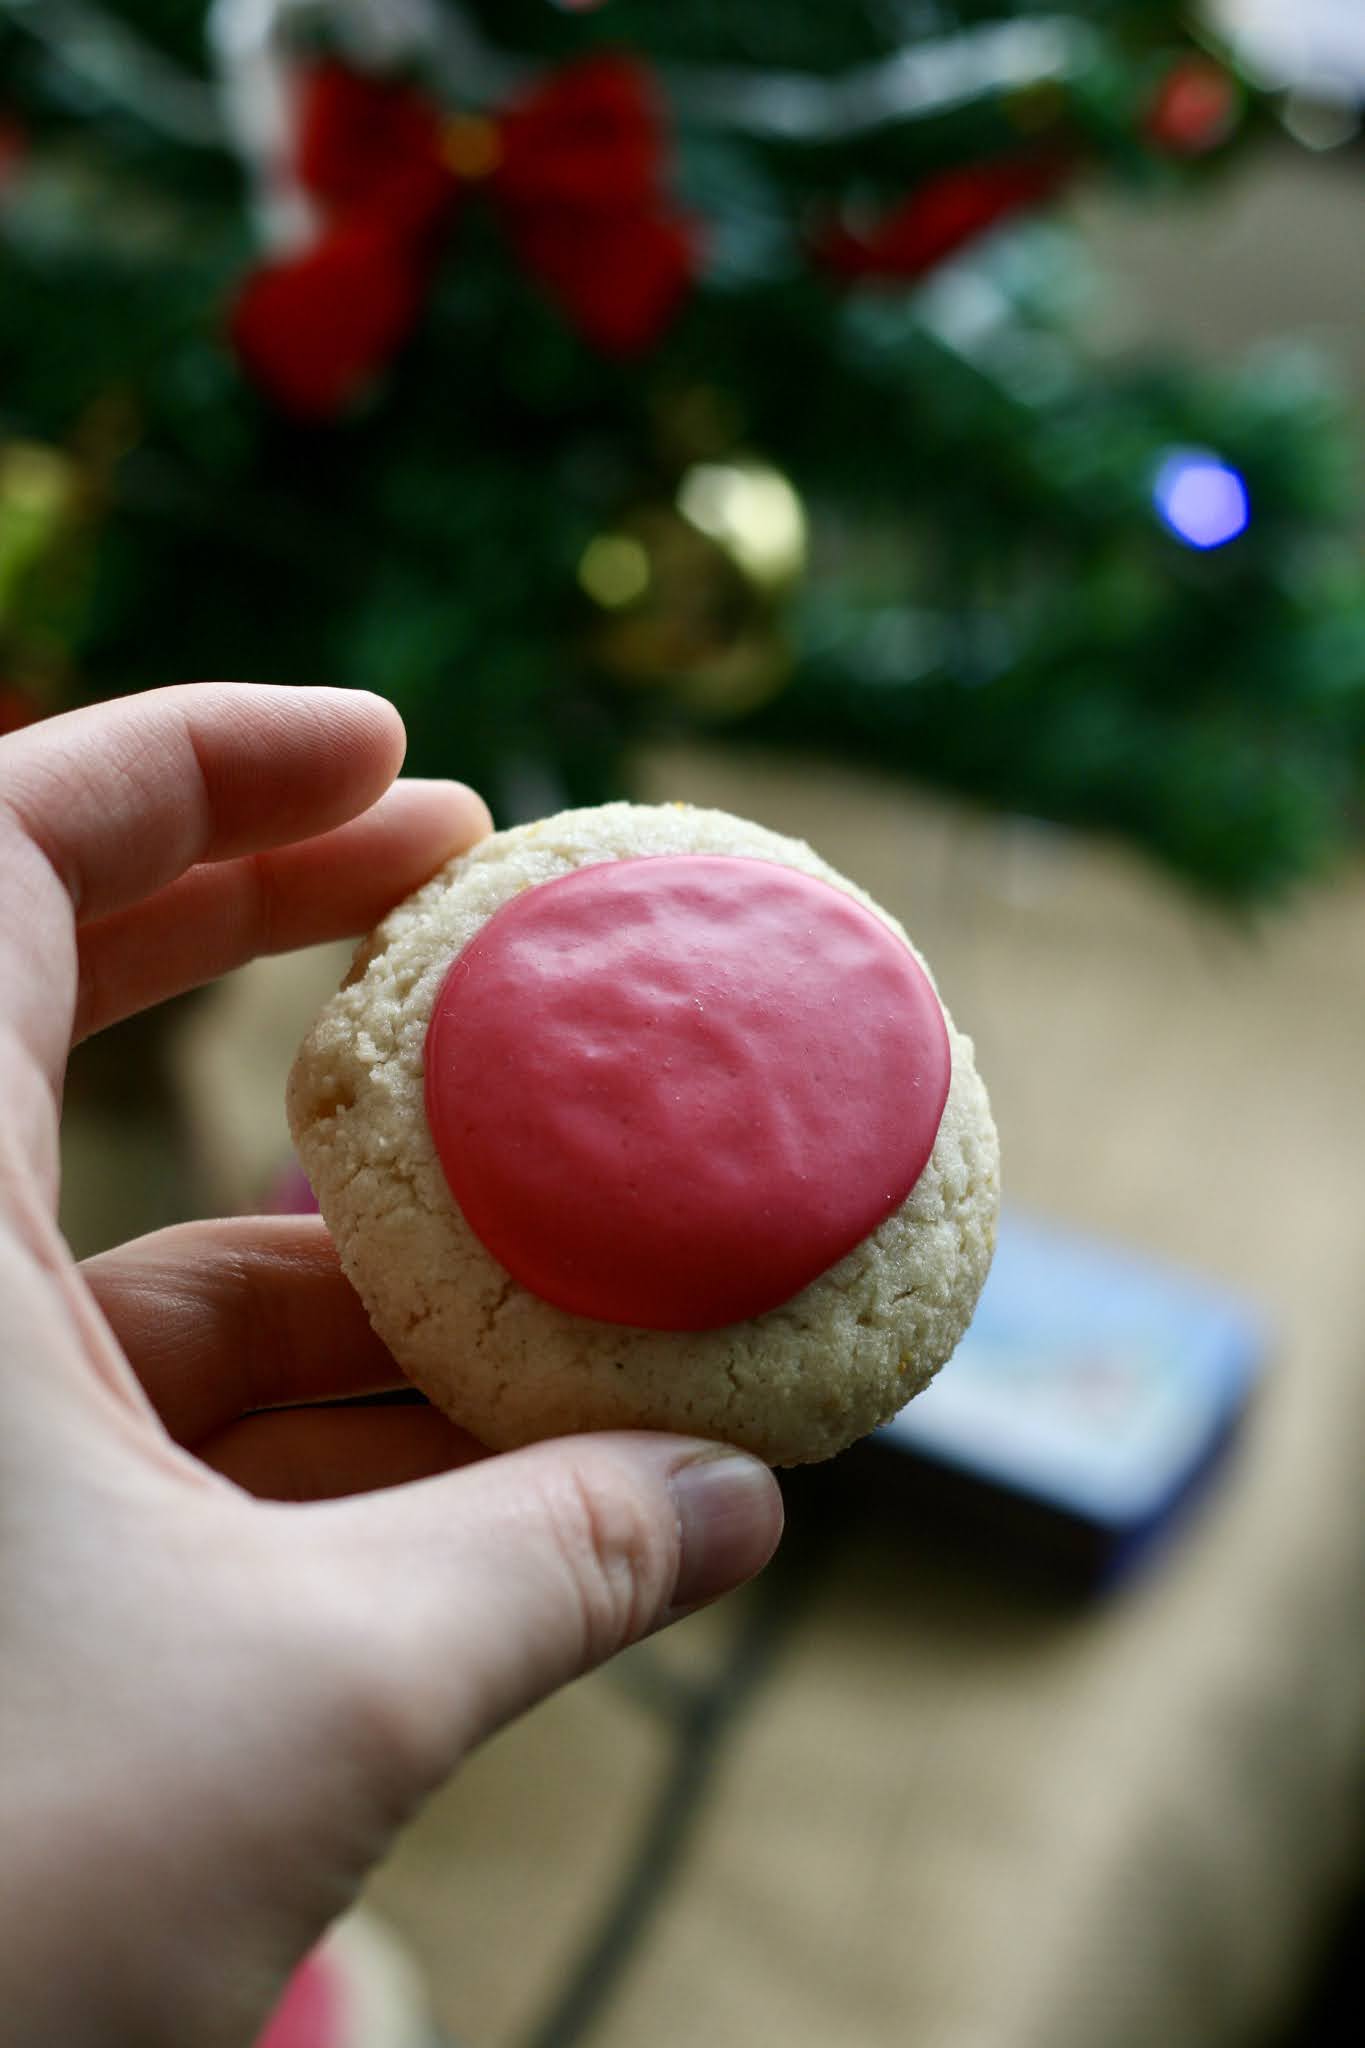
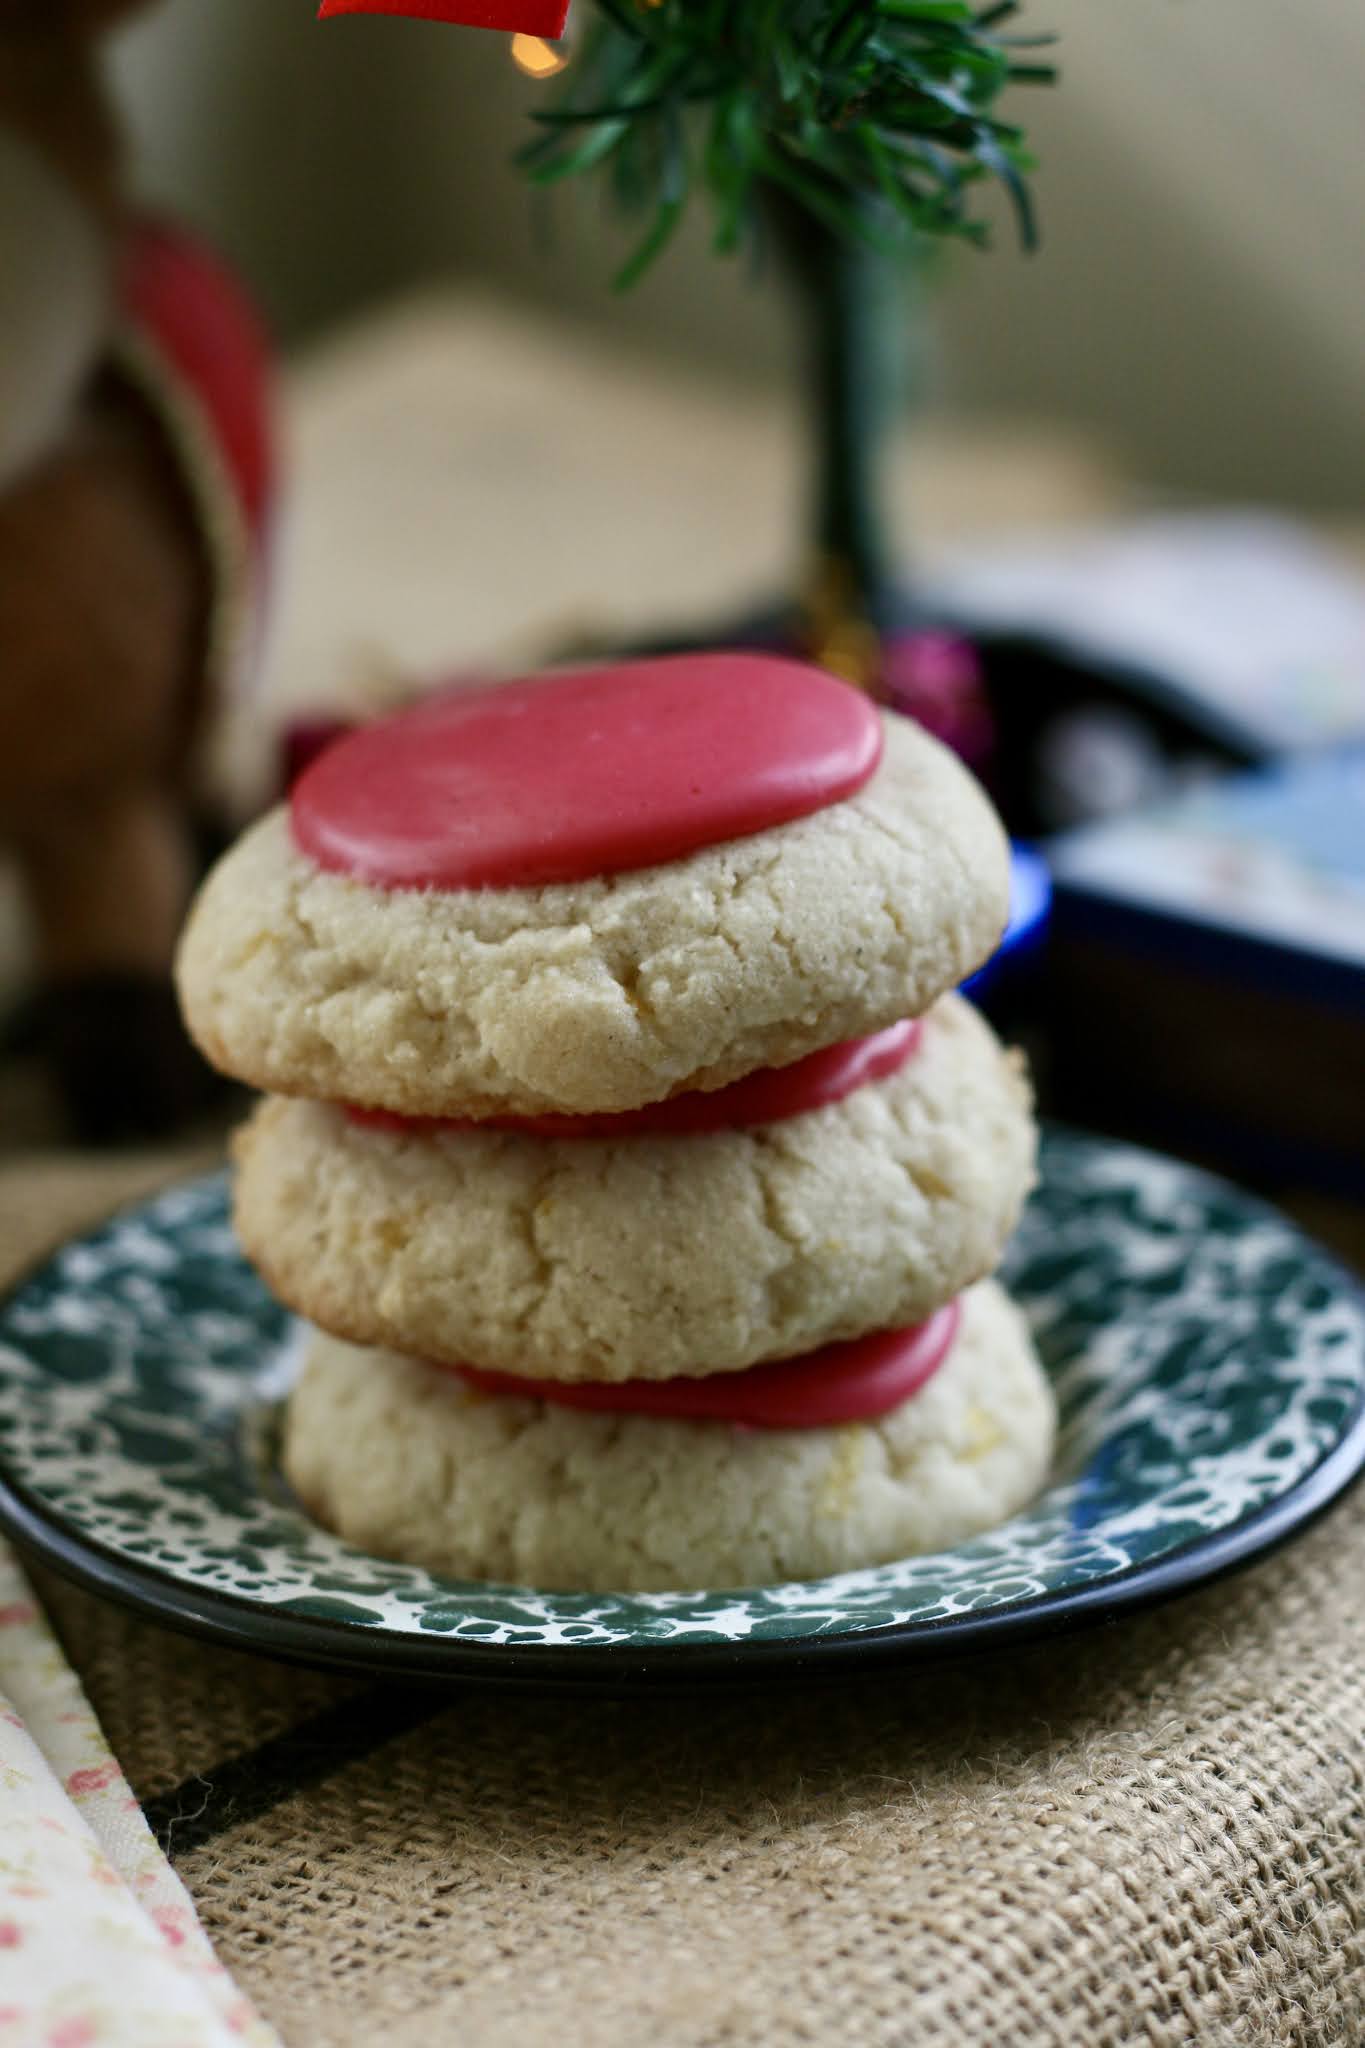
Eric Kim and Nigella Lawson are the geniuses behind these beauties! I aimed for a slightly underdone cookie with barely golden edges to make sure that the chewy middle stayed intact. The outsides remain brilliantly crispy, which makes this cookie a textural dream. Enjoy!

Almond Cookies with Cranberry Glaze
Yield: 10-12 cookies
Ingredients for the cookies:
- 1 medium lemon
- 2 cups (192 grams) super-fine or finely ground almond flour (not almond meal)
- 1 cup (201 grams) granulated sugar
- 1 teaspoon vanilla extract
- 1/4 teaspoon ground cardamom
- 1/2 teaspoon kosher salt
- 2 large egg whites
Ingredients for the glaze:**
- 1 cup fresh or frozen cranberries
- 1 cup powdered sugar
- Pinch of salt
**Glaze can be made ahead and stored in the fridge for up to one week. Bring to room temperature or microwave slightly before using, stirring to reincorporate it.
Directions:
Arrange a rack in the middle or upper third of the oven and heat the oven to 350°F. Line a baking sheet with parchment paper or a reusable mat.
Finely grate the zest of 1 medium lemon (about 1 tablespoon) into a medium bowl. Reserve the lemon. Add 2 cups almond flour, 1 cup granulated sugar, 2 large egg whites, 1 teaspoon vanilla extract, 1/4 teaspoon ground cardamom, and 1/2 teaspoon kosher salt to the lemon zest. Beat against the side of the bowl with a wooden spoon until so well combined the almond flour hydrates and forms a paste-like dough.
Using a tablespoon cookie dough scoop or dampened hands, form the dough into heaping 1-tablespoon balls. Place on the baking sheet evenly spaced apart, you should have about a dozen cookies. Using the palm of your hand, press each ball down to flatten slightly until about 3/4-inch thick. These are thick bois and best that way, so don't squish them too far.
Bake until the bottom edges turn a light golden color, about 18-20 minutes, rotating cookie sheet halfway through baking. Remove from the oven and allow to cool slightly on the pan before transferring the cookies to a wire rack while you make the glaze. (You can also just keep the cookies on the parchment for glazing, just remove them from the hot pan so they can cool).
Juice the reserved lemon until you have 2 tablespoons of juice. Place the juice and 1 cup cranberries in a small saucepan over medium heat and bring to a gentle simmer. Simmer until the cranberries start to burst and the juices reduce slightly, 3-4 minutes.
Fit a fine-mesh strainer over a medium bowl. Add the cranberries to the strainer and press the fruit through with a spoon or rubber spatula. Be sure to scrape the underside of the sieve (that’s where you’ll find most of the strained pulp). You should have about 2 tablespoons fruit pulp in the bowl, if you have more than that, remove it to a separate dish in case you need more after adding the powdered sugar.
Sift 1 cup powdered sugar into the pulp and whisk until smooth and well incorporated. Add a pinch of salt to enhance the flavor. The glaze should be bright pink-red and glossy, and when you lift the whisk and drizzle the glaze it should leave a little trail on top before disappearing. If it seems too thin/dark, add more powdered sugar. If it seems too thick and not glossy, add a little more cranberry puree or some milk if you have it.
At this point, the cookies should be cool enough to handle/glaze. Spoon a little glaze onto a cookie and then carefully spread it outwards with your spoon, but not so far that it drips off the edges. Allow the cookies to sit out until the glaze is set, this can take some time so don't worry!
Once set, store in an airtight container for 2-3 days at room temperature. Use parchment paper to separate if stacking the cookies in layers.
Source: adapted from Eric Kim